Pay online

![]() and how to use it...
and how to use it...
Connecting To A Server:
When you start the Cute-FTP application, by default it automatically opens with the "Site Manager" window (as shown below).
- Select the desired connection and verify that the connection information is correct.
- Click on the Connect button to connect to the remote host.
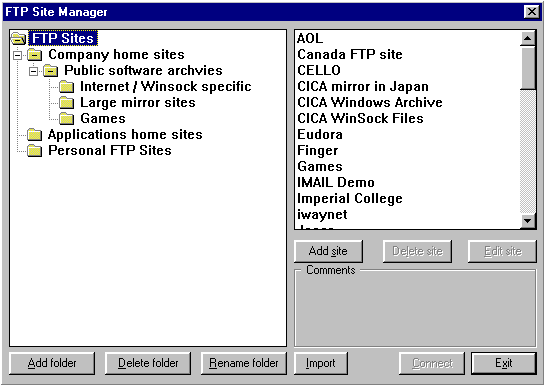
Creating a Connection Profile:
It is recommended that you create a connection profile for sites that you connect to on a regular basis. This will provide you with a more efficient method to connect to the server of choice without the need to repeatedly enter connection information.
- Click on Add site to start creating a new profile.
- In Site Label, enter a word or phrase to describe the connection.
- In Host Address, enter the address of the FTP server to connect to.
- In User ID, enter your username. Note: Most servers allow anonymous access. To login using this method, check the Anonymous box. Otherwise, you will need to also enter a password in Password.
- If you wish to specify which directory to start in on the remote system, enter it in Initial Remote Directory.
- To specify a directory on your system that will automatically be displayed upon connection, enter it in Initial Local Directory, or click on ? to select one.
- Click on the OK button to add the new profile to the list.
When You Are Connected:
Cute FTP is designed to be an easy-to-use program for file transfers between systems. It's display is similar to other FTP programs, in that the left side shows files and directories on your system, the right side shows files and directories on the remote system, and the top half shows FTP commands and replies.
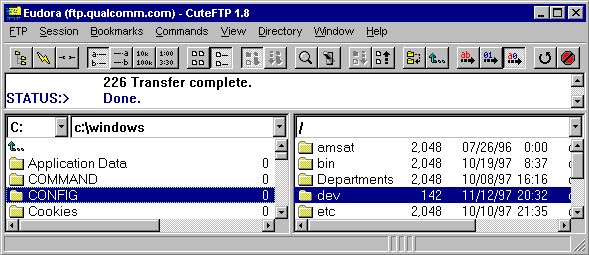
To transfer files from your computer to the server, switch to the
correct directory on the left, and switch to the desired directory to upload
to on the right. NOTE: If you are only transferring text files (web
pages, or files ending in: txt, ini, and so on) you should choose ASCII
file transfer by selecting the ![]() button. Otherwise if you are
only transferring binary files (files ending in: gif, jpg, exe, com, zip, dll,
and so on) you should choose Binary file transfer by selecting
button. Otherwise if you are
only transferring binary files (files ending in: gif, jpg, exe, com, zip, dll,
and so on) you should choose Binary file transfer by selecting ![]() button. Select the file(s) you wish to transfer on the left and
the select the
button. Select the file(s) you wish to transfer on the left and
the select the ![]() button. To transfer files to your computer
from the server select the directory on your computer to save the file(s) in
and then switch to the directory on the remote system that contains the
file(s) that you want to download. Now select the
button. To transfer files to your computer
from the server select the directory on your computer to save the file(s) in
and then switch to the directory on the remote system that contains the
file(s) that you want to download. Now select the ![]() button to start the transfer.
button to start the transfer.
Support: support@iwaynet.net